How to maximum your productivty with Kinesis keyboard in MacOS
This is a summary of my current development environment setup around Kinesis keyboard. The goal is to maximize ergonomy and keep hands on the keyboard.
Kinesis keyboard
Did I mention I love my Kinesis Advantage keyboard? Definitely the best $270 I ever spent.
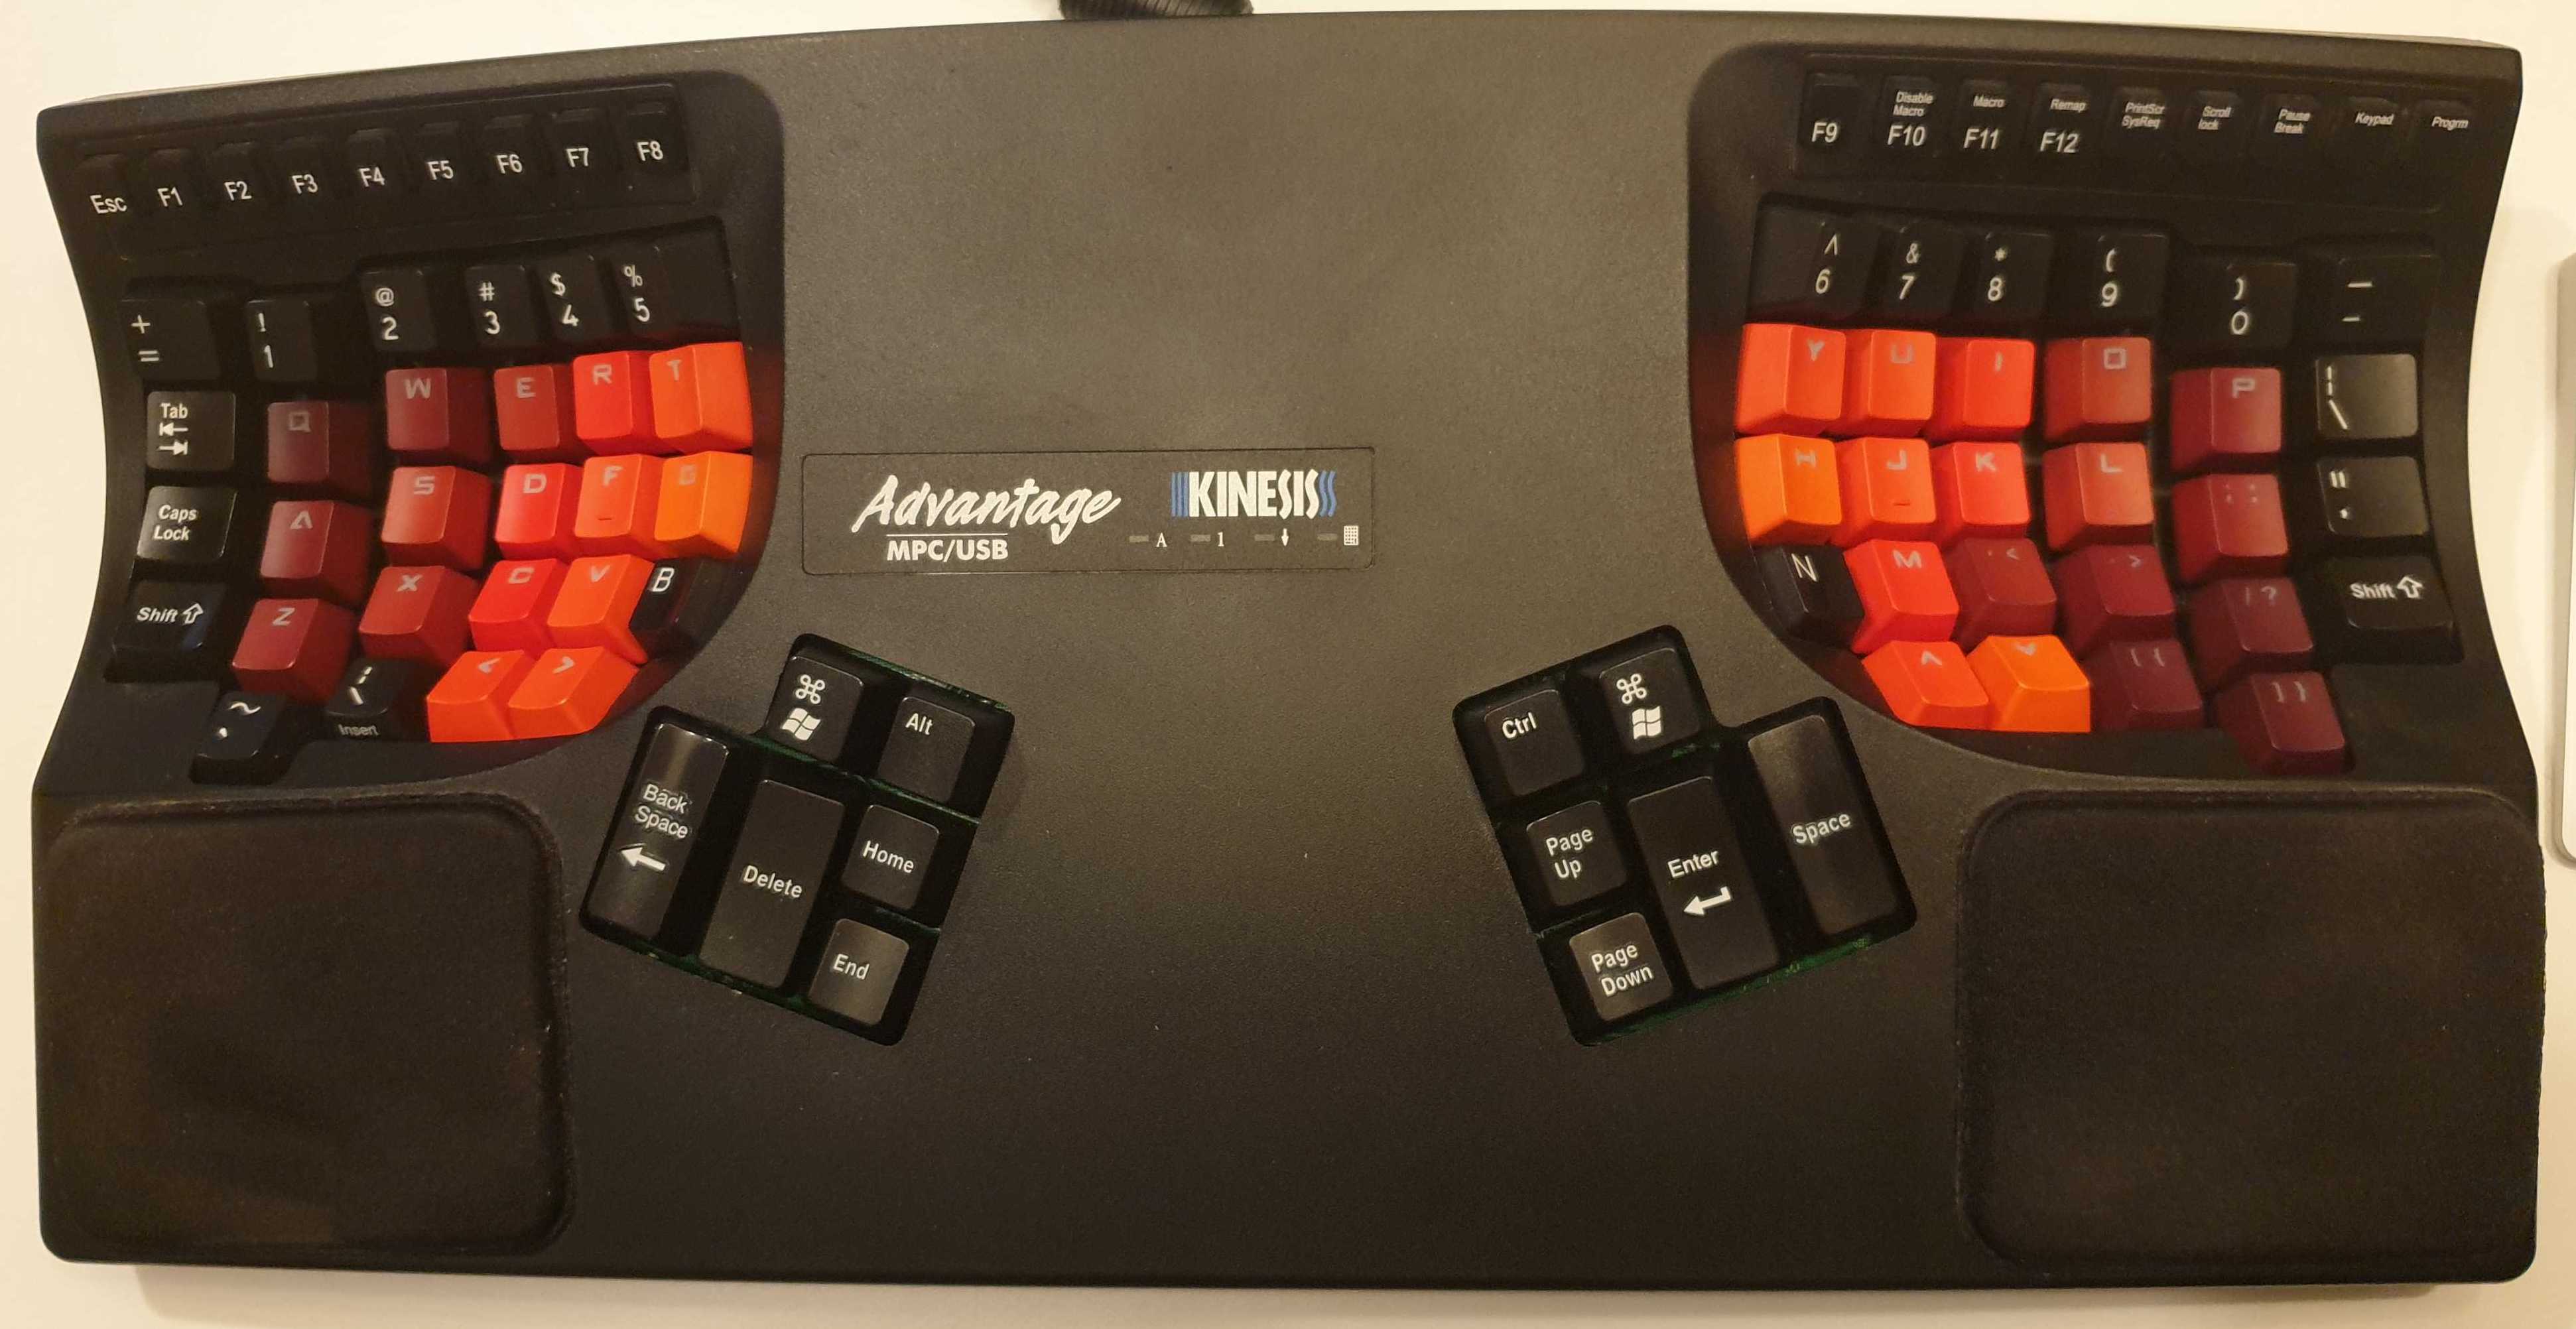
I remember trying it the first time and not being impressed. In 2014 I was thinking about getting my first mechanical keyboard (or the second one…since my first computer back in 1991 has a mechanical keyboard and it was the only option in my city at that time), a colleague in Ericsson showed me his Kinesis from work and told me how it healed his wrist pain. But it was too much struggle for me just to learn the new layout at the spot. So I didn’t really see the benefits.
Later when I started working for another company I started to develop some mild wrist pain. And I didn’t know it was caused by typing, since I was using a WASD 87 keyboard(It is a great keyboard nonetheless). Luckily during my trip to US I was able to get a Kinesis Advantage keyboard for “only” $270 and I never felt any wrist pain ever since. Now it is my daily coding keyboard.
Things I love about Kinesis:
- Keep your wrist straight while typing
- Use your thumb more, not just for the spacebar
- No needs to move your arms, unless you need to use your mouse
Some disadvantages:
- Doesn’t work with games, since you need both hands to type
- The rubber function keys don’t feel as good as other keyboards
- There is a bug that caused some mod keys (for example the
shiftkey) to keep sending signal after it’s released. It’s fixed in the new version though.
Key remaps
Kinesis keyboard has native support for MacOS’s command keys, you just need to switch it to Mac mode according to the manual. However, I made some customization to make my environment even more convenient, using a combination of Kinesis built-in remapping feature and the awesome Karabiner-Elements written by @tekezo.
First, press “=” + “m” key to enable Mac mode. Then press “=” + “F4” so that F4 media key feature is enabled.
Secondly, add the following setting in Karabiner:

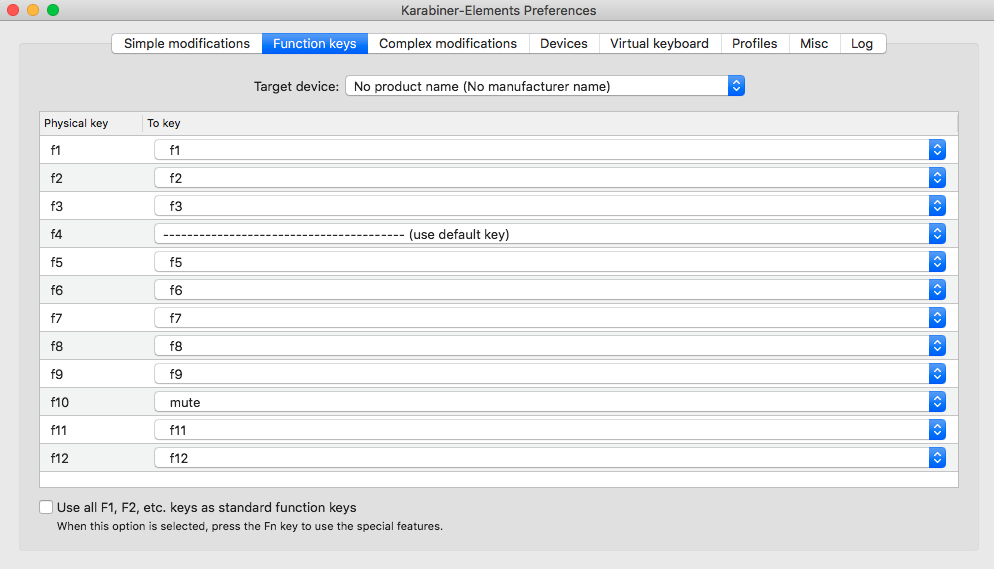
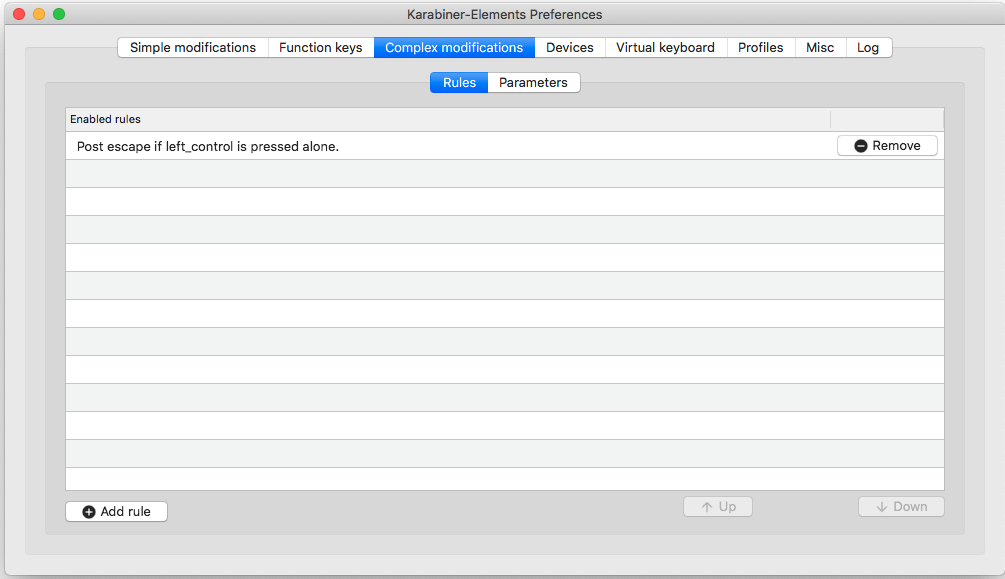
In the end, this is what you will have:
- Cap lock -> When use alone = Escape, when use with other keys = Left ctrl
- Scroll lock -> Mute sound (Anyone still uses Scroll lock?)
- Break -> Decrease volume
- Print screen -> Increase volume
- F4 -> Play/Stop music
BTW if you like Karabiner, please consider donate some beer money to the author.
Mouseless navigation
I have been trying to get rid of mouse for years. It feels like such an interruption every time when I move my arm from keyboard to reach the mouse. Unfortunately you can’t use tile window manager in MacOS, so I have to improvise.
Window layout and re-position
I use BetterTouchTool and Magnet to manipulate Window sizes and positions. But later I realize you could achieve all the Magnet features using BetterTouchTool as well. So you really just need one software. The actions I use most are:
- Make window full screen
- Move window to another monitor
- Set window to half screen
Vim extensions in browser
Since I used to be a long time Vim users (now Spacemacs), I use Vimium extension
in both Firefox and Chrome. It’s perfect. Just type f and you can navigate to
any links on the webpage via keyboard. It’s super fast.
TODO add a small piece on the common commands I use
Conclusion
What is your tips and software